Version 2 of MiraCheck introduced linking from most of the Item types. Prior to that, there was the ability to link from within Item labels. This existing post discusses that type of linking and is still viable for many use cases.
The Basics of Linking
There are some basics you need to learn to use linking. There are many options. You can link to another item within the current current checklist, you can link to another external checklist continuing where it’s last progress was at, and you can deep-link to another item in an external checklist directly to a specific item. You can also decide to go to the item without returning, or providing a way to Go Back to where you jumped from.
The first thing to do is for any Items, Sections, Lists or Checklists you want to link to, to set a unique ID on it. You do this is in the Advanced panel in the editor. Below is the Advanced panel for an Item.
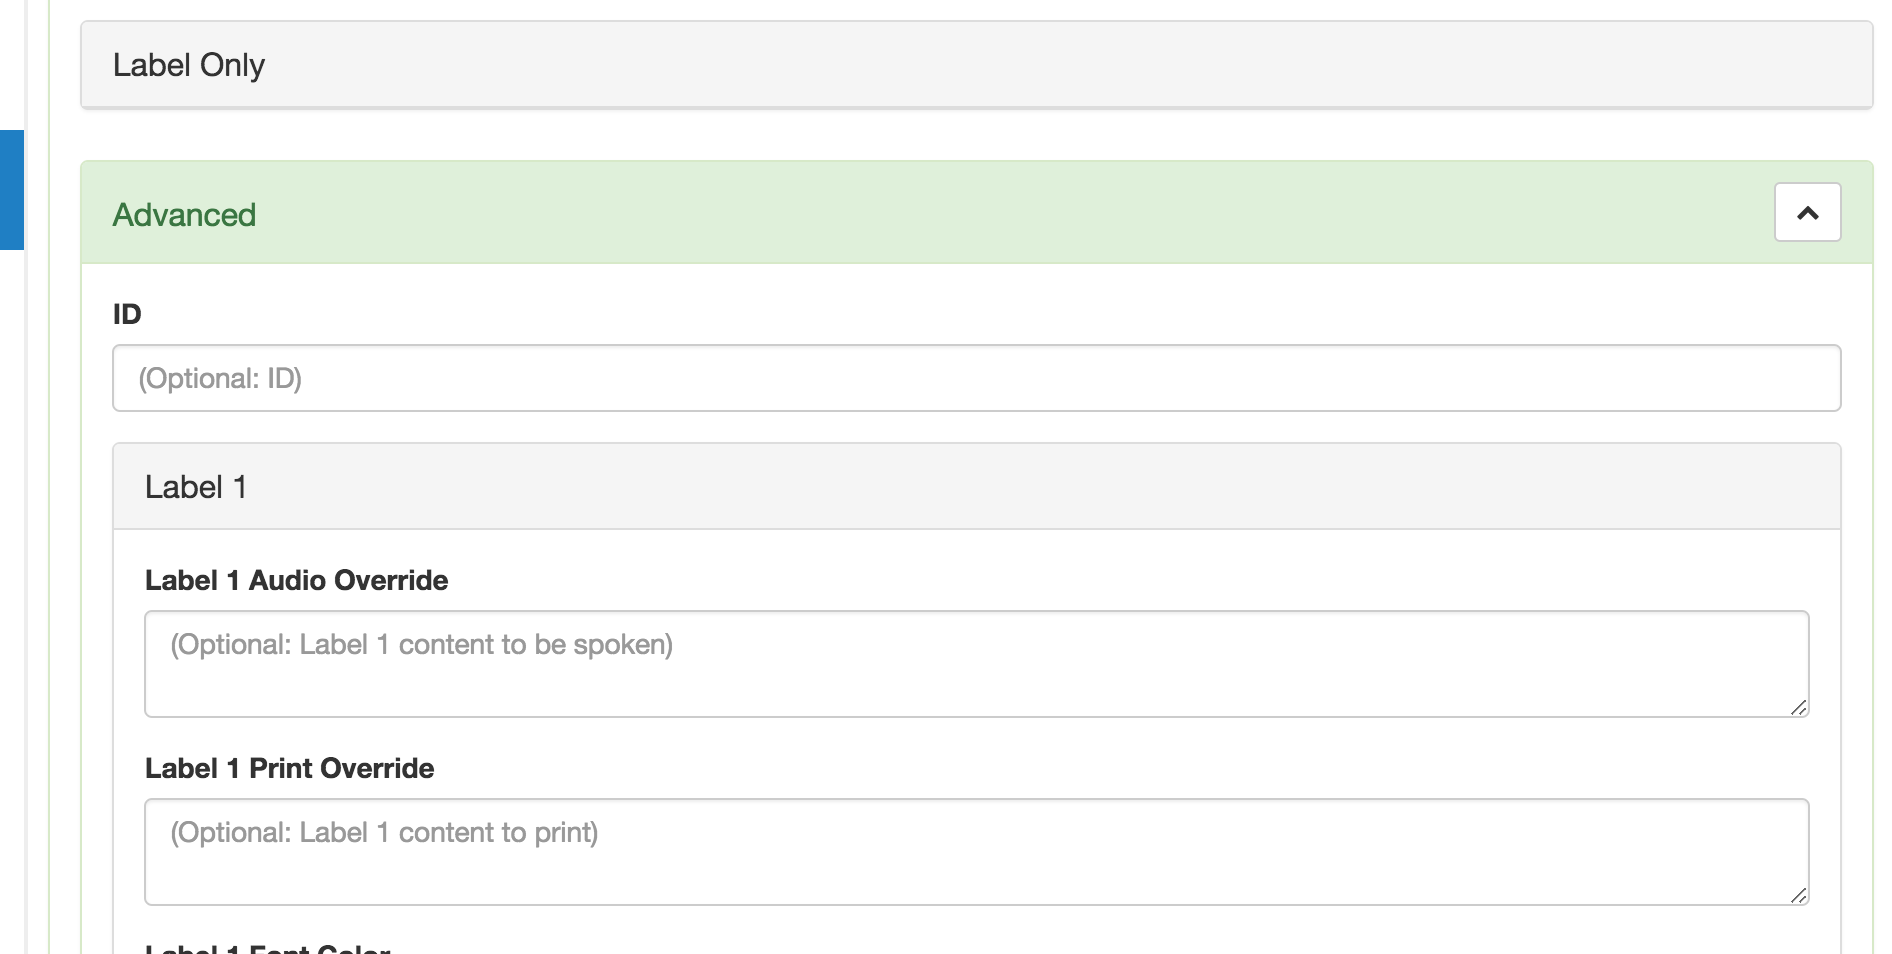
In the ID field you would define a unique ID. Make sure this is unique ID within the checklist, and if setting an ID for a Checklist, make sure it is unique across all of your checklists. Do not put spaces in the ID. Use dashes or underscores for spaces or use camelCase (e.g. id-with-dashes, id_with_underscores, idWithCamelCase). Although not necessary, choose one style and be consistent with it.
Once you have your ID’s defined, you can now have other items link to them.
In the Link ID fields for where you are linking from there is syntax you use for the different options.
Link to item within checklist: #item-id
Link to external checklist: checklist-id
Deep-link to external checklist and item: checklist-id;#item-id
Linking within the Checklist
Let’s use the Yes / No item type as an example. For that item type, you can link somewhere when you click Yes and somewhere else where you click No. First make sure you created your ID’s for the two places you want to link to. For this example I have an item where I set an ID tie-down on one item and an ID hangar on another item.
This is what it looks like for our Yes / No example…
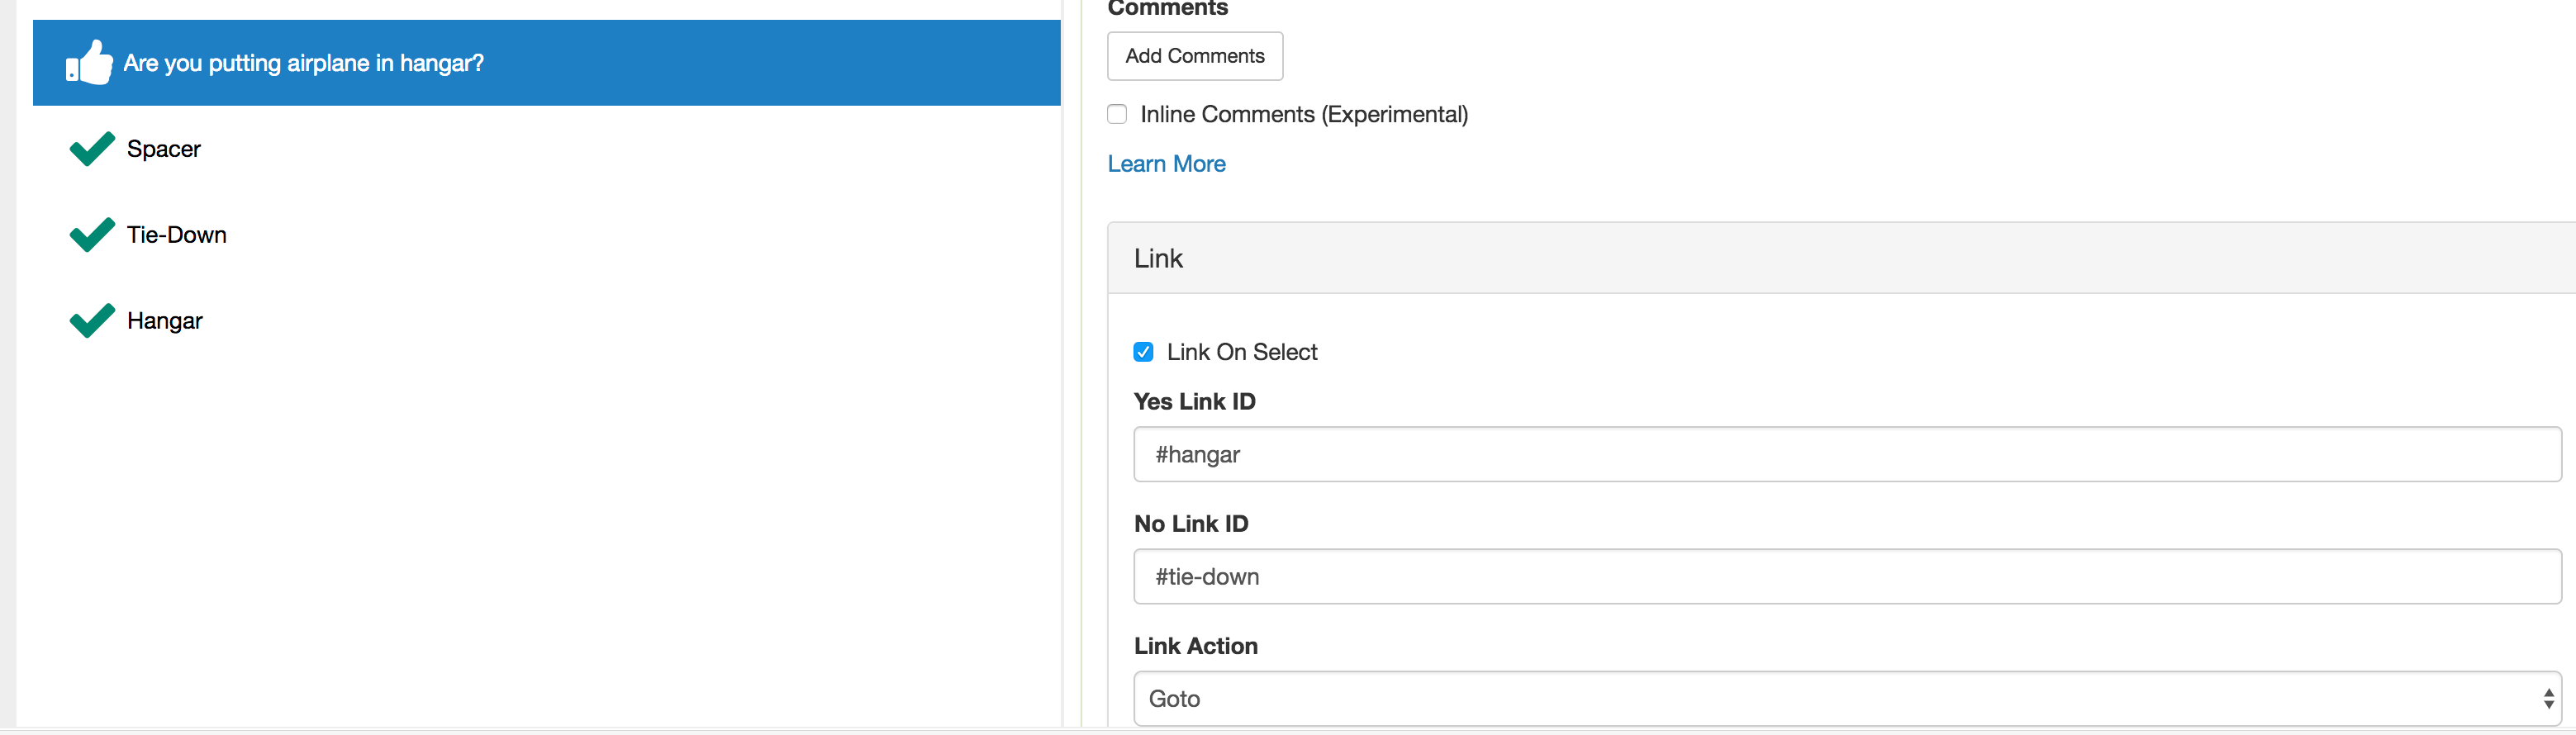
Make sure you check the Link on Select checkbox so it links when you select the item.
In the Yes Link ID you would put the value: #hangar
In the No Link ID you would put the value: #tie-down
In the Link Action you can select Goto if you want to jump there only, and you can select Goto and Return if you want to give and option to return back to where you jumped from.
In this example, I chose to only jump because there would be no need to return where I came from. An example of when you would choose Goto and Return would be say you created a section of your reference speeds for the aircraft in a Reference List. You could add a link right before your takeoff items to Review Speeds. In this case you would want to jump to those speeds and have an easy way to get back to continue with the takeoff.
Linking to an External Checklist
To link to another checklist, make sure to add an ID to the checklist node in the tree you want to link to.
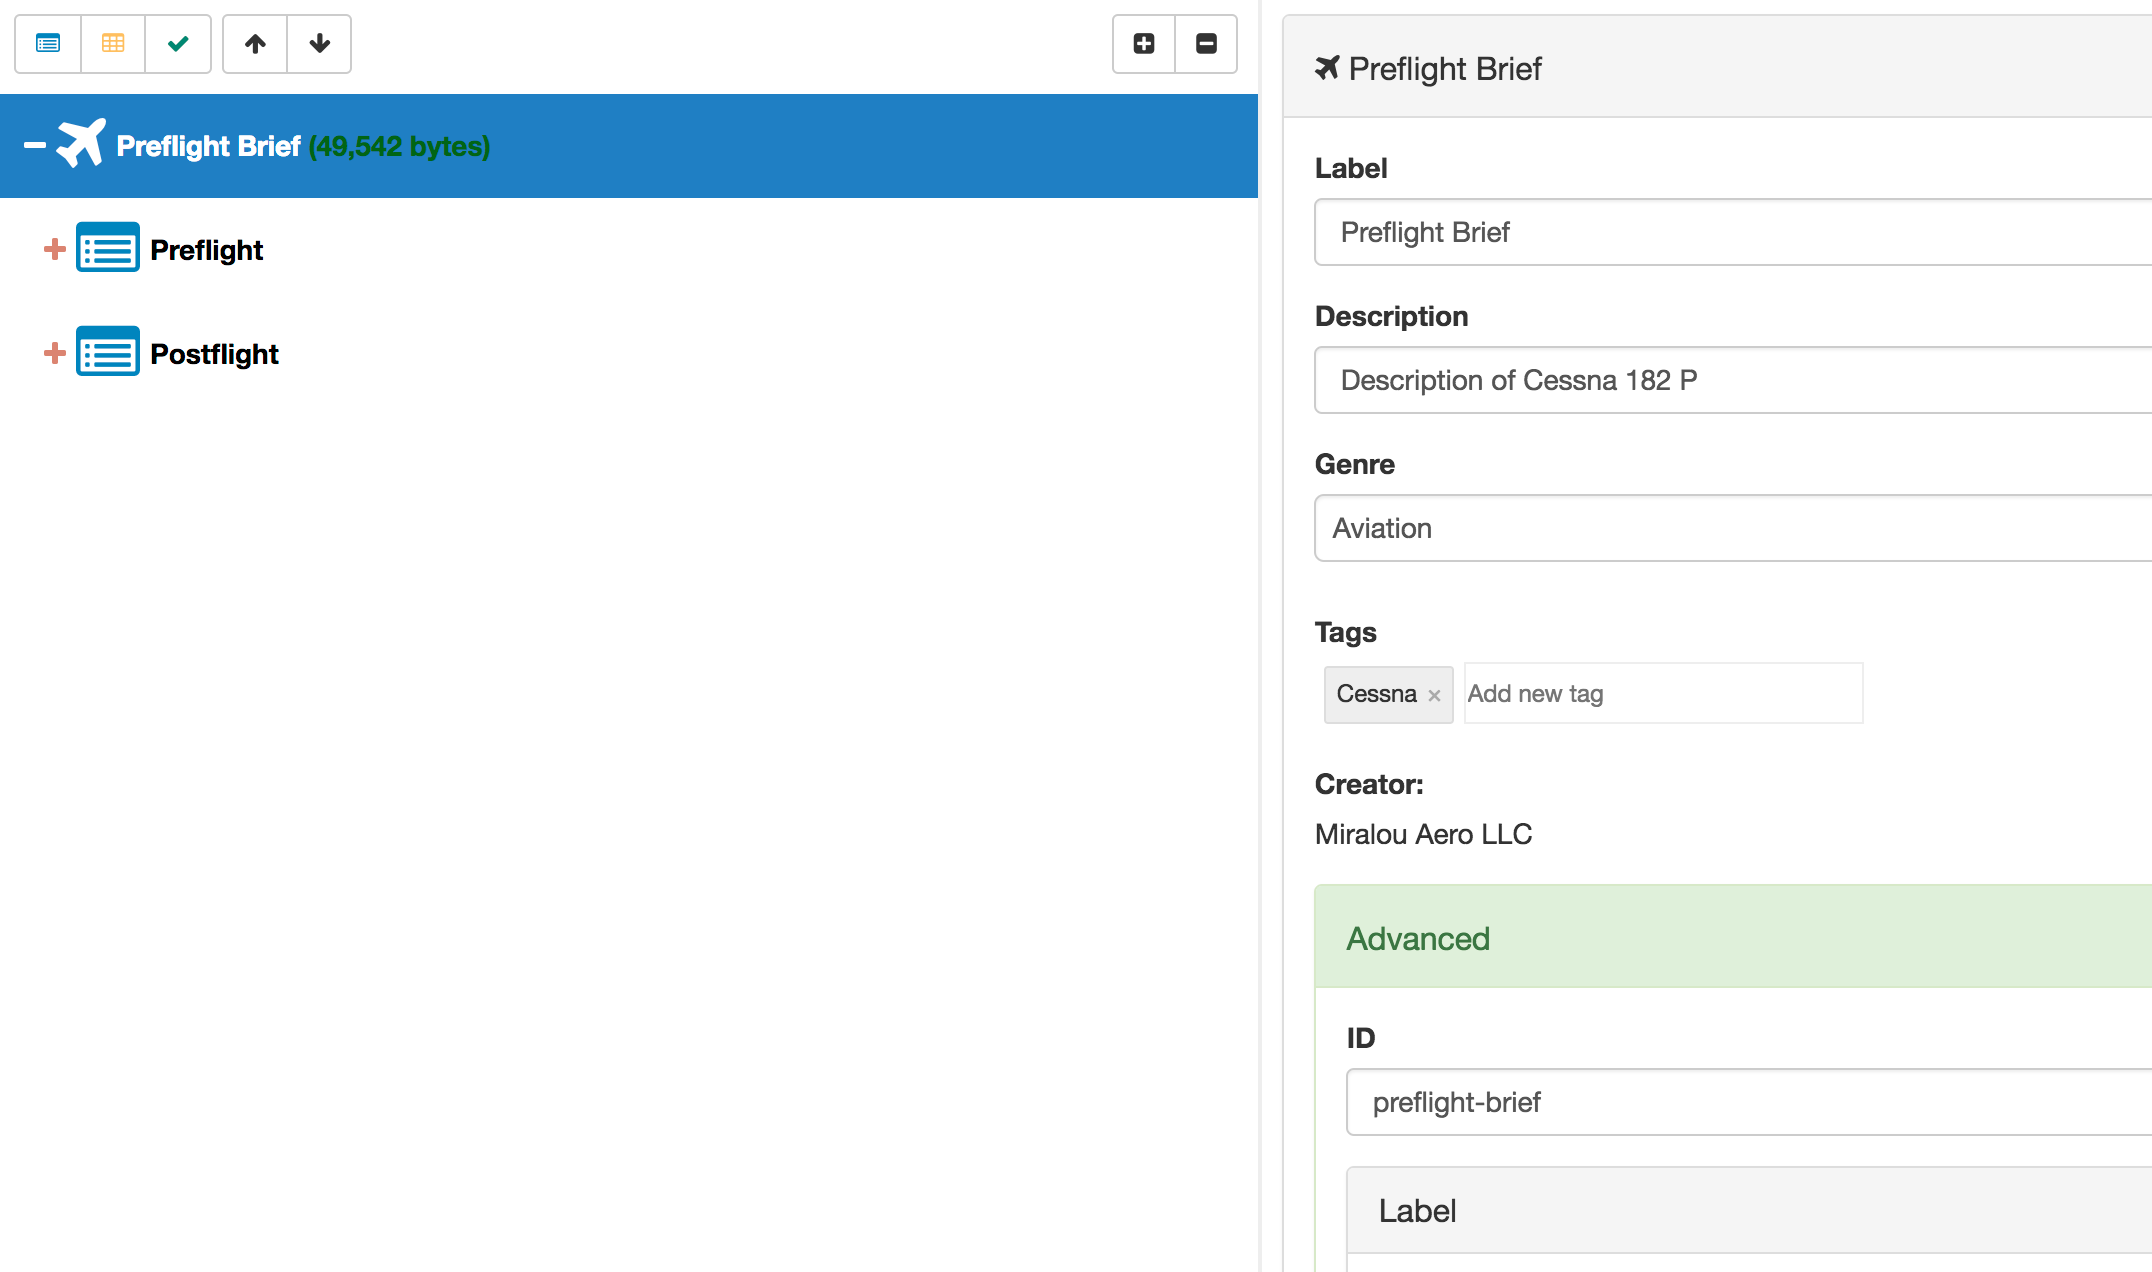
By linking to external checklists, you can create very modular checklists and share them across other checklists. An example would be say that you fly multiple aircraft. For each of these you may have a preflight brief checklist that you would go through regardless of aircraft. You can create that as its own checklist, and then each of the aircraft can link to it. To link to this checklist in the Link ID field you would put: preflight-brief and it would open up the external checklist. Typically if linking to an external checklist, you want to use the Goto and Return Link Action so that you can return from where you came from.
Linking Command Reference
There are many commands that can be used for linking. Here is the Linking Command Reference.